I still manage to get on Pinterest, of course, and found these great little pin cushion mason jars.
 |
| Via Pinterest |
Supplies needed:
* Mason jar (size of your choosing. The lid needs to be able to have the center piece removed.)
* Fabric (a leftover scrap piece would work - it just needs to be a little bit bigger than the removeable center piece of the lid)
* Batting or poly fiberfill
* Hot glue gun
* Hot glue sticks
I already had most of my supplies. The only one I needed to buy were these little sewing kits. They were $1.47 each at Walmart.
1) Take a piece of fabric and put your metal center piece from the lid on it.
2) Then cut a circle out of the fabric. Depending on how big you want the pin cushion to be, will depend on how big you need to cut the circle. I just eyeballed it.
3) Then, get your hot glue gun and put some glue on one part of the inside of the lid.
I only put it on one side first because the glue dries fast and I wanted to make sure that I put the fabric in correctly.
4) Keeping doing step 3 until you have secured the fabric completely around the inside of the lid.
The fabric I used was a bit thick, so I made sure that the circle fit flush around the inside edge of the lid. I didn't want there to be any fabric sticking out making it hard to screw the lid back on the jar once done. That would be a major bummer.
5) I originally was going to use poly fiberfill, but ran out. So, I used some batting instead. I just cut up little pieces and placed them inside, up against the fabric.
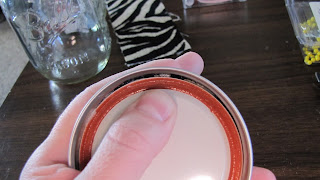
6) To test out if you have enough batting, just squish it all in with the metal center piece and poke some needles into the pin cushion. When you feel that it's all good, push down on the batting with your fingers and then put some hot glue on the inside rim of the lid (right above where my thumb is, but underneath the metal center piece). I also did this on the exact opposite side of the lid. Then, quickly (before the glue dries) squish it all in with the metal center piece and make sure to apply pressure where you applied the hot glue. This step will secure the metal center piece to the inside of the lid so everything will stay in place.
7) Then, put all of your sewing kit goodies inside and put the lid back on and ta-da! Your done!
I definitely plan on making more of these. They are so cute and cheap to make. It's also good to have one of these in central spot, so you don't have to pull out your sewing basket. Everything for a quick mend is all in one place.


As soon as I saw mason jars I HAD to follow you!
ReplyDeleteGreat idea! I love love love it!!!
Sherry's Bees Nest
Oh, you are so sweet! Thank you! I'm planning on some other uses for them too...
Delete