Well, it's finally looking like winter, here in Southern California. I'm enjoying this gloomy, rainy weekend. It's nice relaxing weather, especially after the week I've had.
First thing's first - I decided I'm not going to do a "weekly" post of Pinterest inspired projects anymore. Some weeks, I haven't done a project for this, so I feel like I have to do one just for the weekly post and when I force myself to do something, it doesn't become fun anymore. On the other hand, sometimes I have several that I've done in a week, but don't want to wait until it's time to do the weekly post. So, I've just decided to post them when I want to. And trust me - there will be more Pinterest inspired projects to come.
Today, I'm sharing this really cool gift I made for my brother. I got the idea from my sister-in-law. She pinned this on Pinterest:
She made a really cute version of this for my nephew & his wife. I had planned on making something else for my brother involving maps, but after I saw hers, I decided to try this instead.
So, let's roll with the tutorial...
Supplies needed:
*Fabric
*Thread
*Sewing machine
*Embroidery floss (colors of your choice)
*Sewing needle
*Embroidery hoop (optional, but it helps and they're pretty cheap)
*Poly fiberfill
*Printed outline of the state and/or country of your choice
1) First, I decided to use some of the leftover canvas dropcloth that I used for the Christmas tree skirt that I made last month. I worried about it not being soft enough, even after I washed it 3 times. But after handling the fabric so much during this project, it wasn't too bad. It wasn't super soft, but not real rough either. It's supposed to be decorative, so I figured that it would be o.k. Also, because I was going to use 1 country and 3 states, I needed the pillow to be more of a rectangular shape than square. I ended up cutting 2 pieces measuring 14 1/2" x 21".
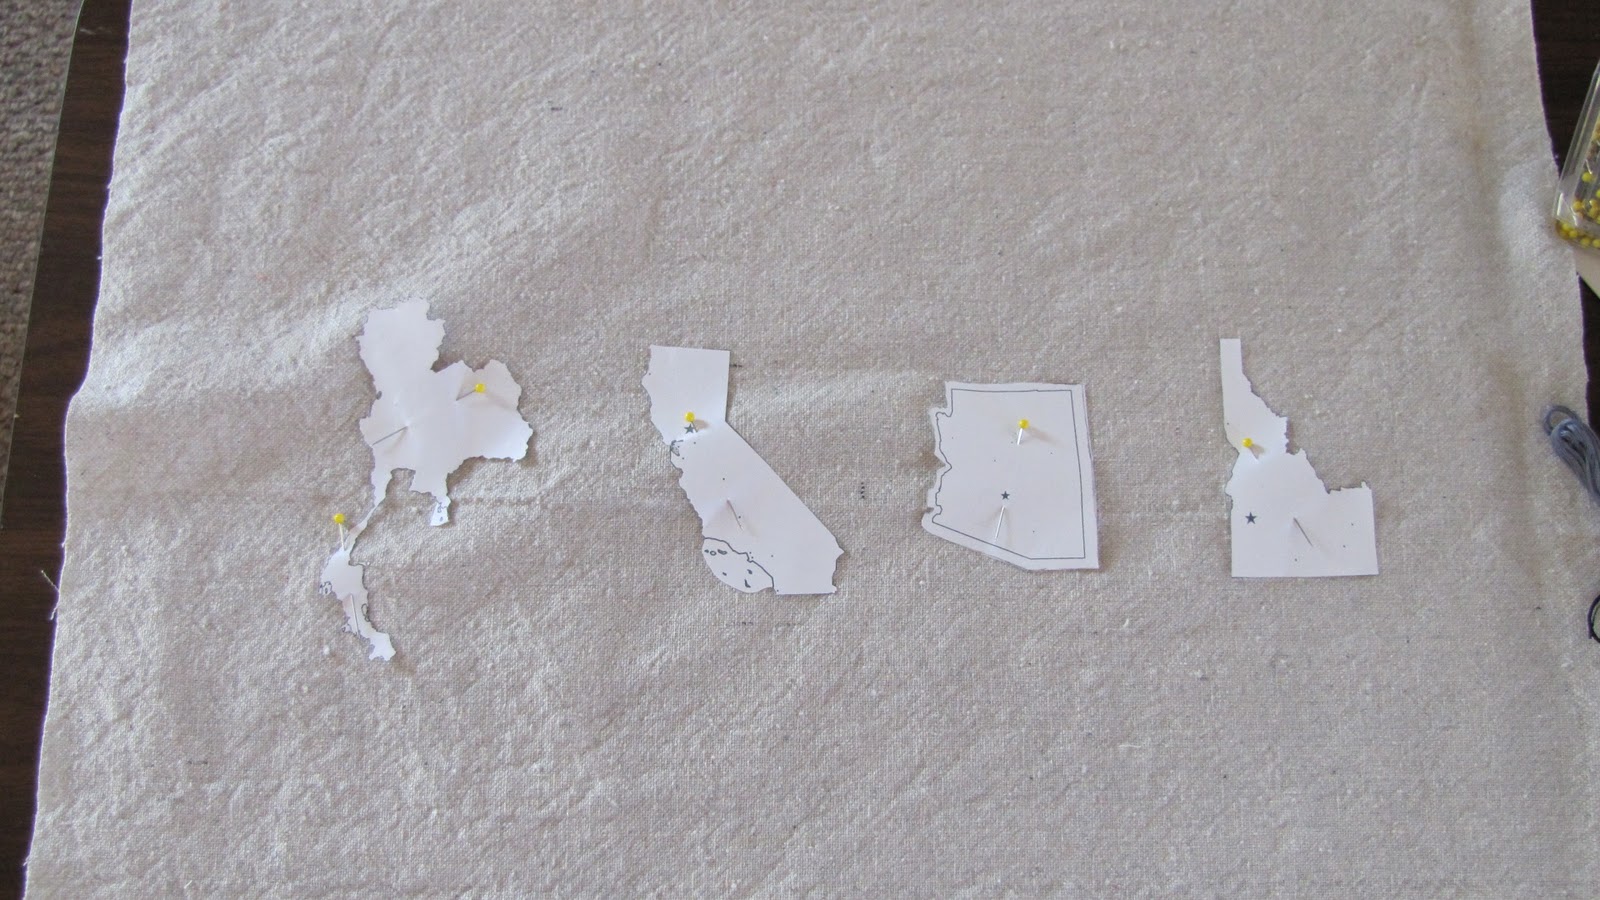
2) I printed outlines for the country and 3 states I was going to use for this project. I debated on how I would get the outline onto the fabric, but I needed to get this done fairly quickly, so I decided that tracing it onto the fabric would take too long. So, I cut the outlines out and just pinned them onto the fabric.
 In case you're wondering, my brother was born in Thailand, moved to California as a child, then to Arizona as an adult, and now he's in Idaho. Also, these are not to scale. At. All. I couldn't do them to scale or it would look weird. Just go with it, ok?
3) After I pinned them onto the fabric, I placed my embroidery hoop around the area I was going to stitch on. The hoop keeps the fabric taut, thus easier to do any hand-stitching. Then, using the sewing needle and embroidery floss, just stitch around the shape of the paper. It actually was pretty easy doing it this way and one less step without having to trace the image. Hopefully, your template won't tear like mine did (at least it was after I was already done with the stitching part).

4) I completed step 3 for all of the other states. I picked another color of embroidery floss that I had and used that to make the dashed lines in between the

5) Did you notice the dents the hoop makes on the fabric? Well, you'll just have to whip out your trusty 'ol iron and ironing board and iron those puppies out. Just iron both pieces while you're at it.
6) Place both pieces of fabric with the right sides facing each other and sew 3 of the sides together.

7) I have a couple of old pillows that were so out of shape and didn't fit my decor anymore, so I decided to take one of them apart and use the filling inside for this new pillow. Yay for recycling!

8) Just stuff the pillow until you feel it's a good amount. Now, you'll need to stitch up the last side of the pillow. Fold down the rough edges into the inside of the pillow to make a hem. Using thread that matched the fabric, I did a stitch (I think it's called a ladder stitch) to connect both hems together from the inside of the seams, but concealing the thread so you can't see it.

9) Here is the final product.

I am really, really pleased with how this came out. And I plan on making more as gifts. My brother liked it too - you know, even though he is a guy and shouldn't care about pillows. :)
Linked up to Too Much Time on my Hand's Get Schooled Saturday link party.

Linked up to Tatertots & Jello's Weekend Wrap Up party

Linked up to The 36th Avenue's link party

Linked up to It All Started With Paint's Pillowpalooza link party


First thing's first - I decided I'm not going to do a "weekly" post of Pinterest inspired projects anymore. Some weeks, I haven't done a project for this, so I feel like I have to do one just for the weekly post and when I force myself to do something, it doesn't become fun anymore. On the other hand, sometimes I have several that I've done in a week, but don't want to wait until it's time to do the weekly post. So, I've just decided to post them when I want to. And trust me - there will be more Pinterest inspired projects to come.
Today, I'm sharing this really cool gift I made for my brother. I got the idea from my sister-in-law. She pinned this on Pinterest:
 |
| Via Pinterest |
So, let's roll with the tutorial...
Supplies needed:
*Fabric
*Thread
*Sewing machine
*Embroidery floss (colors of your choice)
*Sewing needle
*Embroidery hoop (optional, but it helps and they're pretty cheap)
*Poly fiberfill
*Printed outline of the state and/or country of your choice
1) First, I decided to use some of the leftover canvas dropcloth that I used for the Christmas tree skirt that I made last month. I worried about it not being soft enough, even after I washed it 3 times. But after handling the fabric so much during this project, it wasn't too bad. It wasn't super soft, but not real rough either. It's supposed to be decorative, so I figured that it would be o.k. Also, because I was going to use 1 country and 3 states, I needed the pillow to be more of a rectangular shape than square. I ended up cutting 2 pieces measuring 14 1/2" x 21".
2) I printed outlines for the country and 3 states I was going to use for this project. I debated on how I would get the outline onto the fabric, but I needed to get this done fairly quickly, so I decided that tracing it onto the fabric would take too long. So, I cut the outlines out and just pinned them onto the fabric.
3) After I pinned them onto the fabric, I placed my embroidery hoop around the area I was going to stitch on. The hoop keeps the fabric taut, thus easier to do any hand-stitching. Then, using the sewing needle and embroidery floss, just stitch around the shape of the paper. It actually was pretty easy doing it this way and one less step without having to trace the image. Hopefully, your template won't tear like mine did (at least it was after I was already done with the stitching part).

4) I completed step 3 for all of the other states. I picked another color of embroidery floss that I had and used that to make the dashed lines in between the

5) Did you notice the dents the hoop makes on the fabric? Well, you'll just have to whip out your trusty 'ol iron and ironing board and iron those puppies out. Just iron both pieces while you're at it.
6) Place both pieces of fabric with the right sides facing each other and sew 3 of the sides together.

7) I have a couple of old pillows that were so out of shape and didn't fit my decor anymore, so I decided to take one of them apart and use the filling inside for this new pillow. Yay for recycling!

8) Just stuff the pillow until you feel it's a good amount. Now, you'll need to stitch up the last side of the pillow. Fold down the rough edges into the inside of the pillow to make a hem. Using thread that matched the fabric, I did a stitch (I think it's called a ladder stitch) to connect both hems together from the inside of the seams, but concealing the thread so you can't see it.

9) Here is the final product.

I am really, really pleased with how this came out. And I plan on making more as gifts. My brother liked it too - you know, even though he is a guy and shouldn't care about pillows. :)
Linked up to Too Much Time on my Hand's Get Schooled Saturday link party.
Linked up to Tatertots & Jello's Weekend Wrap Up party

Linked up to The 36th Avenue's link party

Linked up to It All Started With Paint's Pillowpalooza link party
Love this!! You have way more patience than I do, can't you make me one too :)thanks for stopping by!
ReplyDeleteI love this pillow! You did a great job! Trying to figure out where I'll put one...
ReplyDeleteLove this! I might just have to make myself one of these!
ReplyDeleteHey Jess - if you do make one, I want to see how it turns out! :)
Delete