
I had found this (below) on Pinterest and being a huge Beatles fan, thought it was way cool.
 |
| Via Always in Wonder blog |
Here's how I did it...
Supplies:
* Canvas
* Paint
* Image printed on paper
* Craft scissors
* Paint brush (or sponge brush)
* Adhesive
1) I Googled images of the Beatles' Abbey Road album. I happened to find one that was just the silhouettes of them, instead of the original picture. So I printed it out and using my craft scissors (they were easier to use than regular scissors), I cut the figures out. I made sure to cut very carefully in case I needed to use the "reverse" stencil.

2) Once cut, I laid out the stencils/figures, I placed them on the canvas until I got them in a spot that I liked. I liked the placement of the original that I found on Pinterest, so I used that as my guide.

3) I didn't have any repositional spray adhesive and I didn't want to use my permanent spray adhesive for fear that the stencils wouldn't come off when it was time to remove them. So, I used double-sided tape. This ended up not being a good idea, but I digress.
4) I searched through my many sample pots of paint and decided on "Anonymous" by Behr. It's a nice, dark gray color and I figured it would match with pretty much most color/decor schemes. Using a sponge brush, I just splattered the paint in all different directions. There was no rhyme or reason to it - I just splattered it until I thought it looked good.

5) Since the paint was thick in some spots, it was sort of hard to see where the stencils were. So, I decided to take the stencils off while it was still wet.
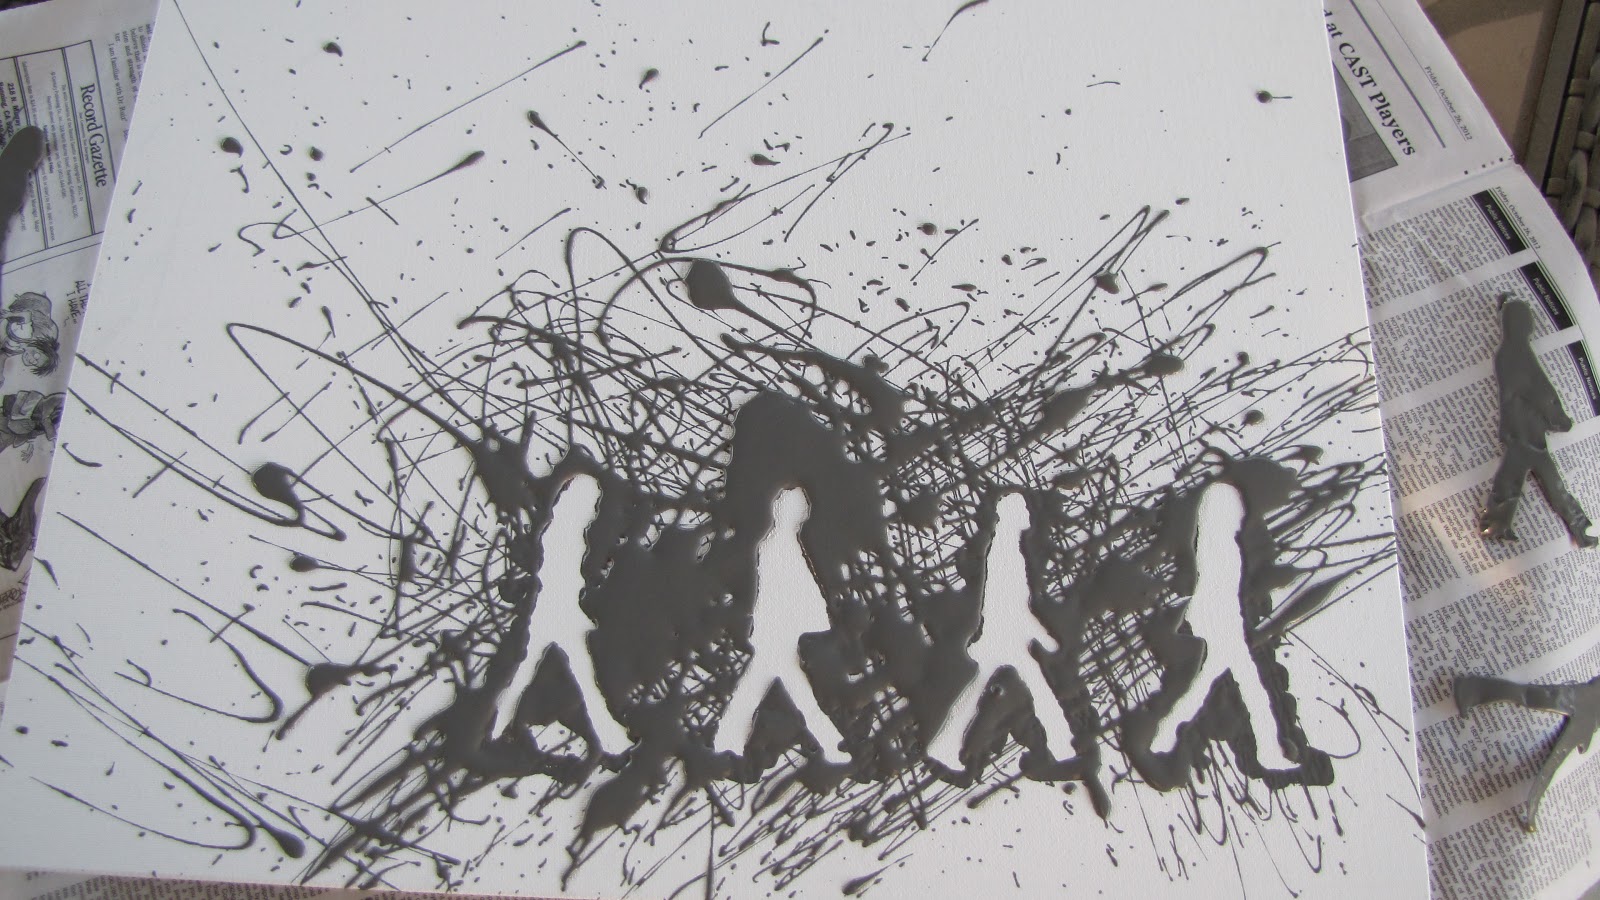
6) If you look closely at the figures in the picture above, you can see that in several spots, the paint leaked. There were jacked-up feet, hands, heads all over the place. So, I racked my brain to try to think how to fix them or if I should just go buy some repositional spray adhesive and start over. Since I wouldn't be able to go to the store for a few days, I decided to just try and fix it - if it didn't work, then I would just start from scratch. I decided to use my reverse stencil that I had taken the time to very carefully cut out.

7) I matched the figure on the canvas to the figure of the reverse stencil and taped it into place over the figure. I also held it in place with my fingers to ensure that it stayed in place. Using my off-the-shelf Pure White Behr paint, I painted within the stencil with an artist's brush. It just so happened that this white paint matched the white of the canvas perfectly. If I accidentally painted "outside of the lines", I just dipped some of the gray paint onto the tip of a wood skewer and touched it up. It was actually very easy.

8) Paul went from looking like this...


George came out looking really good too.

And here is all 4 of them after I touched them all up.


Here's the final product. This is one where it's leaning against the wall...
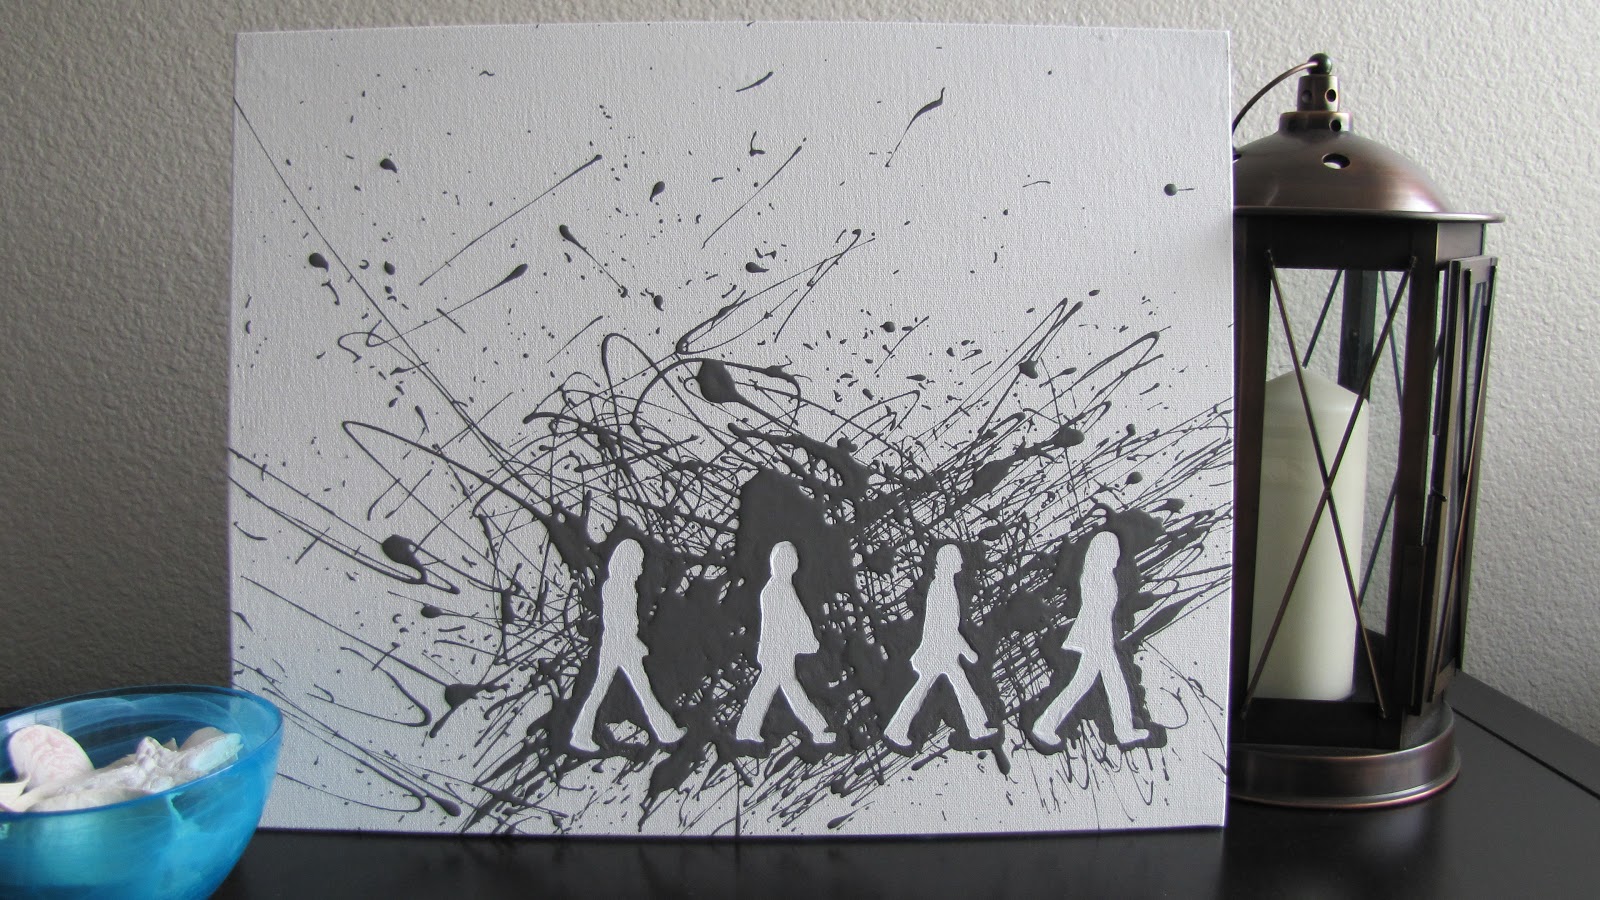

I hope he likes it!! I was actually very, very thrilled with how it came out. I'm going to make one for myself (eventually), but probably paint a nice chevron background. But, I'll definitely need to go buy that repositional spray adhesive first!
I hope everyone has been enjoying the holiday and time with their families! And as always, thanks for stopping by.
originally posted by http://adventuresindiy1759.blogspot.com/
Linked up to:
Homework's Inspiration Board link party

The DIY Dreamer's From Dream to Reality link party

Smart School {House} & The NY Melrose Family's Whimsy Wednesdays link party

Home Stories A to Z Tutorials & Tips link party

Lil Luna's link party

House on the Way's Twirl & Take a Bow link party

Live Laugh Rowe's Live Laugh Linky link party

House of Hepworths Hookin' Up With HOH link party

A Bowl Full of Lemons One Project At A Time link party

Delightful Order's Delightfully Inspiring link party

The 36th Avenue's weekly link party

One Artsy Mama's Shine On Fridays link party

Tater Tots & Jello Weekend Wrap Up link party

Too Much Time's Get Schooled Saturday link party

Creatively Living's Monday Funday link party

Liz Marie Blog & Love of Family & Home's Make It link party

seriously? seriously. did i know you were a beatles fan? this is getting freaky, my friend. and this looks awesome, i love the size of it!
ReplyDeleteYou did a great job Chrissy. My husband loves the Beatles! This would make a good gift idea for him.
ReplyDeleteHi Chrissy, I love it - I just might try this myself. I'm just stopping by to say how delightful your blog is. Thanks so much for sharing. I have recently found your blog and am now following you, and will visit often. Please stop by my blog and perhaps you would like to follow me also. Have a wonderful day. Hugs, Chris
ReplyDeletehttp://chelencarter-retiredandlovingit.blogspot.ca/
Cool! Thanks so much for sharing at my Twirl & Take a Bow Party. Have a great week.
ReplyDeleteLeslie
House on the Way
Thanks, Leslie - and thanks for hosting!
DeleteThis is awesome. Love it:)
ReplyDeleteHopping by and following your lovely blog's twitter, and GFC. Your Pinterest link seems broken. I blog @ Getting Healthy with Essential Oils
I am also inviting you to join Tiddle Diddle Handmade Shoppe's first giveaway event.
Thank you so much! And thanks for letting me know about my Pinterest link - it's all fixed now. :)
DeleteThat is absolutely AMAZING!!!
ReplyDeleteWhat a brilliant idea -
Your newest follower ( visiting from Homework )
would love a follow back when you have the time
Hugs,
Suzan