
 |
| Source for both pictures above |
Supplies:
* 1 1/2 yards of liner fabric ($5.61 - on sale)
* 1 1/2 yards of main outer fabric ($5.40 - with 60% off coupon)
* Magnetic snap closure ($3.22 for 2 snaps, so cost for the 1 I used $1.61 - with 40% off coupon)
* Thread (already had on hand)
* Batting (already had on hand - was leftover that was given to me)
* Pieces of cardboard
1) I drew out the design and figured out the dimensions I wanted it to be.

2) I then cut out the pieces according to the dimensions I wanted and just added an inch to all of them: liner fabric, outer fabric, and batting.

3) I started with the strap - sew the outer and liner fabrics, right sides facing together. Leave an opening so you can turn it inside out and then hand sew the opening closed.
4) Next, I sewed pockets onto the "back" piece of the liner fabric. You have to do this before attaching it to the outer fabric.


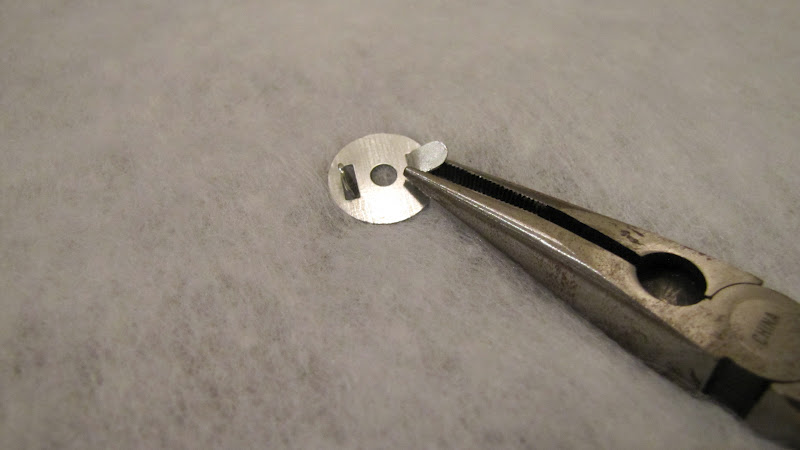
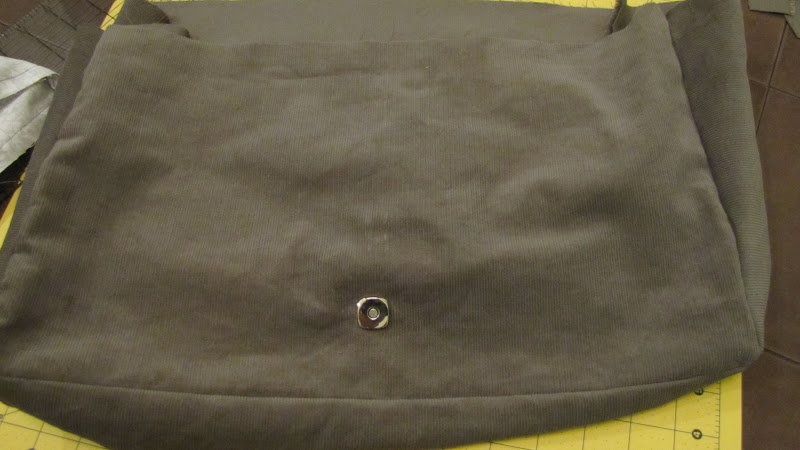
5) I then installed the "female" part of magnetic snap closure onto "front" piece of the main outer fabric & batting.


6) Sew the liner pieces right sides facing together - just sew them in the shape of the bag. If you have specific pieces that have to go on a particular side (ex. front or back), make sure you sew the pieces so they end up in the right spot.


7) Sew all the outer fabric pieces wrong sides facing together (same as Step #6 except you'll do the wrong sides together instead of the right sides together).
8) Sew the batting onto the outer pieces. I just took each piece (one for the bottom of the bag, two for the sides, and two more for the front & back) and sewed it right onto the each part.

9) Now make the flap for the bag.
a) For the ruffle: Cut a strip of the outer fabric (whatever width you'd like and then double it) and then fold it in half length-wise, so it gives a nice "hemmed" edge on the ruffle. Then, fold it in a sort of accordian-style to make the ruffle and lay it on top of the outer fabric on the edge.


10) Turn the outer fabric (which now also has the batting sewn onto it) right side out so that it looks like this.
11) Attach the strap to the sides of the outer fabric, right sides facing each other.


12) Turn the liner fabric wrong side out.

14) Sew around the top circumference and leave an opening in the front at the top edge.
15) Turn the piece right side out through the opening that was left. It will take a little bit of time because you will also be pulling out the strap and flap.

16) Then push the lining back inside the bag and hand-sew the opening closed.

Here's how it will look inside once it's done.

17) Sew reinforcements on the straps near the top, inside edge of the purse like below.

This is how the bag will look at this point. You're almost done!

18) Cut a piece of cardboard to fit inside bottom of bag.
19) Sew a case for the cardboard to fit inside and then hand sew opening. It doesn't have to be anything fancy - just need to cover the cardboard. Heck! You could even hot glue the fabric onto the cardboard.

20) Put the fabric-covered cardboard on bottom inside of bag. This will help the bag from sagging.
21) Make cushion liner for camera. Since it is a camera purse, after-all, I needed something to cushion the camera from all the other stuff I put in the bag.
a) Cut two pieces of liner fabric for the length you need to wrap around your camera (or if you want to just attach the liner like in a regular camera bag that acts as a "wall", then you'll need to cut it to the length that will fit in the bag).
b) Sew them right sides together on 3 sides, leaving one of the shorter-width sizes open.
c) Then, cut batting (I doubled-up on the batting to make it thicker) and trim it so it fits just inside all the stitching you just sewed. You don't want it to go all the way to the edges of the fabric on the two long sides.


e) Sew 3 lines, evenly spaced, throughout the length of those cushion piece. This is what it will look like.


Make sure you place the one velcro set on the correct edges so that it closes (like in the picture below) to make a "circle".


This is how it will look once you velcro the cushion to the inside of the bag. It helps to keep your camera in place inside the bag, but also protects it from the other things you put in it.

I also made a flower using both materials.


But, I ended up finding another flower at H&M that I like much better. Here's the final product...
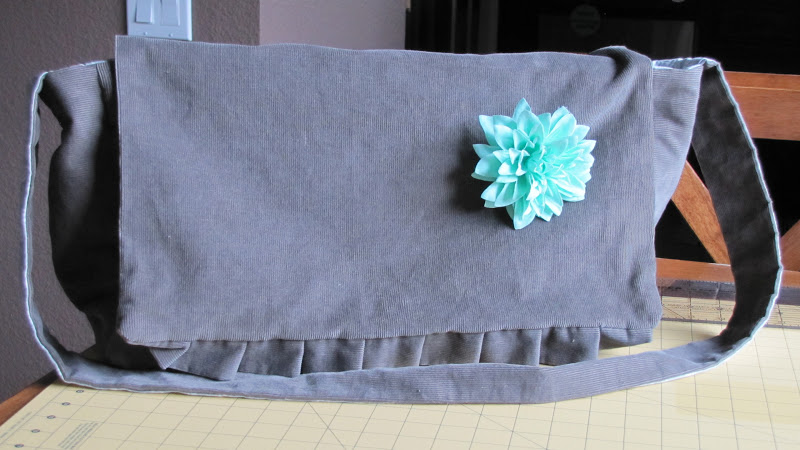

This bag cost me $16.57 total to make, including the flower and I even have some leftover fabric I can use. Not too shabby! I was very impressed that it came out so well, considering that I've never made anything so detailed before. But, I'm not an expert at sewing by any means, so I hope my instructions were clear enough. If you have any questions, feel free to comment or send me a message!
Linked up to:
The DIY Dreamer's From Dream to Reality linky party#40

Homework's Inspiration Board link party

House on the Way's Twirl & Take a Bow link party

The NY Melrose Family & Smart School Houses' Whimsy Wednesdays link party

Live Laugh Rowe's Live Laugh Linky party

House of Hepworths' Hookin Up With HOH link party

Delightful Order's Delightfully Inspiring Thursday link party

The 36th Avenue's Best DIY Projects link party

One Artsy Mama's Shine on Fridays link party

Too Much Time's Get Schooled Saturday link party

Tater Tots & Jello Weekend Wrap Up link party

Thrifty Decor Chick's November Before & After link party

originally posted on & by: http://adventuresindiy1759.blogspot.com/
Wow, I'm so impressed!
ReplyDeleteThis turned out great!! Love the colors and fabrics you chose! Pinning to really read over later. I posted crafty clothes pin and pumpkin serving bowl to the delightful and inspired thursday party:) Following your blog now. Follow me to at www.sewsweetvintage.com
ReplyDeleteW O W ! ! ! I'm SO impressed, Chrissy!!! You did a FANTASTIC job on this!!! I absolutely L-O-V-E it!!! :D
ReplyDelete