Saturday, December 24, 2011

Christmas Card Ornaments

Hey kids!  First of all, I hope everyone has a Merry Christmas tomorrow and is having a great time with family and friends. 

I was planning on getting this post done sooner, but well, ya know, the holidays can be kind of hectic, so here it finally is.  I have had this Christmas ornament since I was a little kid.  My grandmother (who was super crafty) made this out of Christmas cards they had received.

I've been wanting to replicate it, so I collected cards from Christmas last year and finally did it this week.  These would be great to use with those picture cards - you can make one from your own picture cards or make one as a little gift for the person who sent you a picture card!  Here is the tutorial...

Supplies needed:
* 2 Christmas cards of your choosing
* Hole punch with small holes (sorry - not sure what size my hole punch was - I used the smaller hole punch of my Crop-a-dile)
* Crochet hook small enough to fit through the holes (mine is a C2 - 2.75mm)
* Yarn

1)  I made a template from the original ornament my grandmother made.  Then, I traced the template onto 2 Christmas cards.  Remember to cut them in opposite directions since you will need front and back pieces.
The card on the left is one from my friend that included her two cute doggies.
2)  Hold the two pieces together, right sides facing out, and punch holes all the way around the edges.

3)  I used a chain stitch to create the loop in the top right corner so the ornament could be hung.  For all other stitches, I used a half-double crochet and did 2 stitches per hole (some holes I did only 1 stitch and other ones 3.  It just depended on if the space needed filling in or not).***
 ***For the top of the stocking, you can either stitch both pieces together so it will be closed, or you can stitch the top pieces individually, so it will leave an opening and you can put little things in it like a candy cane.

4)  You just stitch all the way around the entire stocking.  Here is the final product!  It was very quick & easy to do.


And cute!  I have a few picture cards that I've received from friends, so I'm planning on turning them into these cute little ornaments for next year.   If you have all the supplies already, you can still get a few of these done tonight if you need a quick little gift for tomorrow!

Tuesday, December 20, 2011

DIY Christmas Tree Skirt

Can you believe there's less than one week until Christmas?  I finished up all of my shopping the other night  and all I have left to do is wrap gifts and clean up a bit.  I do have one other project I'd like to do (I think they would make great little gifts, so I'd love to share the idea), but we'll see if I have time.

After I bought my new tree and found a burlap garland, I decided that I needed a new tree skirt.   I also wanted a tree skirt that I could wash if need be (for some reason, I know people who have had situations in which a tree skirt needed to be washed.  Example:  a cat eating a mouse on the skirt - ewwwww!).  I haven't really seen any store-bought ones that really excited me,  so I got the idea to buy a painters drop cloth at Home Depot and turn it into a tree skirt.  I didn't really have an exact idea of how I wanted to make it, so I kind of just winged it.  Heeeeeeere's the tutorial...

Supplies needed:
*Painters canvas drop cloth
*Thread to match
*Sewing machine
*Hot glue sticks
*Hot glue gun

1)  Firstly, wash the drop cloth - I washed mine 3 times and used about 3 dryer sheets per drying cycle.  It wasn't super soft, but manageable for this purpose.

2)  Determine the size you want for the tree skirt and then draw a circle using a pencil and string as a compass.  I folded the cloth in quarters.   I used a pencil and yarn for the compass - this didn't work out so well for me - I think because the yarn was stretchy, but I wasn't looking for perfection here.

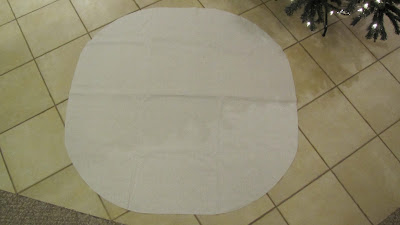
3)  After you draw your circle, cut that puppy out.  Again, not looking for perfection, as you can see below that my circle is far from perfect.  No one will notice - it will be all squished under your tree and gifts.

4)  Cut out a circle in the middle.  The size of your circle depends on how you want it.  Since I have an artificial tree, it didn't need to be very big.  I cut mine too big.  Oops.

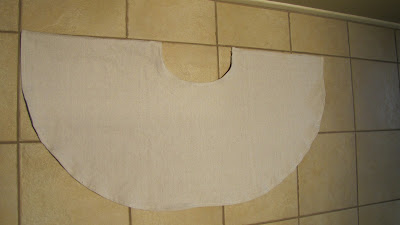
5)  Cut a slit from the inner circle like below.  This will allow you to get the skirt to go around the tree trunk.

6)  I then used my sewing machine to hem the outer circle edge and the edges of the slit.

7)  I then set my sewing machine tension to the highest number and set the stitching to the longest and sewed around the outer edge of the skirt.  Since the material was a bit thick, it gave the outer edges a slight ruffle.  Again, this was not perfectly even all the way around, but it's ok.  No one will notice.  Trust me.

8)  I then cut strips of the same drop cloth and ruffled them by using the same sewing machine settings to make them slightly ruffled. 
My original plan was to sew one ruffled strip around the inner circle edge that I cut, but because I accidentally cut the circle too big, I had to accommodate for that by adding extra strips.  I used 2 skinny strips and then used the extra fabric that I had cut to make that inner circle.

9)  I then tried to sew the ruffled strips to that inner circle edge, but when I sewed it on, it wasn't ruffled anymore - sewing it on, majorly lessened the ruffle effect.  Sigh...  I decided to just hot glue the remaining strips.  I figured that I won't really need to wash it often - only in an "emergency". 
First strip
Second strip
Last strip
And that was it.  Easy peasy!  You can add something to it so that you can connect the slit edges once it's around a tree - like ribbons or buttons.  I left mine plain, but may add something to it later.

Again, it's not perfect, but no one will notice that it's not a perfect circle and that my sewing was uneven.  I think it gives my tree a great natural look.  Also, this project was great for the budget!  It cost me $10 for the drop cloth and I only used about 1/2 of it (maybe less than 1/2), so I can use the leftovers for another project, so it cost me about $5 for the whole project.  Score!

Linking up to Thrifty Decor Chick's Christmas Tree link party.

Sunday, December 18, 2011

Paper Snowflakes: Pinterest Addiction #3

I remember when I was a kid in school, we made our own paper snowflakes during the holiday season.  But, I hadn't thought about that in all these years until I started seeing them pop up all over Pinterest!  It brought back a flood of memories and I thought it would be a good craft to do with my nephew.  So, I broke out the paper, scissors, and my folding skills and we made some snowflakes last weekend.

Now, I'm just warning you that the pictures aren't that great because I have the snowflakes hanging in front of a window, but here we go...


I hung them up with fishing line and just taped them to the ceiling in varying heights.

I decided to put them in front of the window mostly because I already had snowflake lights hanging inside the window (these are the only Christmas lights I decided to do this year since I didn't have any help to put them up).

I like how they look hanging, very Christmasy,  and it was a fun and easy project to do with my nephew. 
Thanks again, Pinterest!

Saturday, December 17, 2011

Pet Paw Stocking

Are you pet lover?   If so, then I have something really cute for you for the holiday season.  See this guy?


It's his second Christmas and he finally got his own stocking this year (his mama was too lazy to make one for his first Christmas. Ahem).

I've actually made quite a few of these (all for dogs.  This was my first one for a cat, but it works exactly the same).  I saw a picture of one many years ago online (unfortunately, it was so long ago that I don't remember where) and decided to try it on my own way back when.  I had to make another one for someone this month, so I was able to take pictures of the steps - let's roll with the tutorial!

Supplies needed:
*Material (I used faux fur, but you can use felt or fleece or a similar material) - you'll need a color to match your pet's coloring
*2nd Material - (again, you can use faux fur or felt or fleece) - this will be white for the cuff or you can use a different color, for example, if your pet has more than one coloring.  It's up to you.
*3rd Material - this will be for the lining
*Felt - this is for the paw pads - you can match your pet's coloring on this also: brown, black, pink, golden...
*Thread to match
*Sewing needle
*Sewing machine (or you can hand sew this.  I did this for the first couple that I made)
*Ribbon

1)  Trace & cut a pattern onto the back of the main material that you will use for the paw.  You will make one with spots for the paw pads and another one without the paw pads (2 pieces).  Also do this with the material for the lining (you'll need 2 pieces - no need to trace spots for the paw pads).


2) Trace & cut a pattern onto felt for the paw pads.
Please excuse this horrible, nighttime picture.
3)  Also, trace & cut the cuff material (rectangular shape).

4)  Next is the most time-consuming part of the project.  Hand sew the felt into the spaces for the pads on the paw material.

This is how it looks after your done.

5)  After you hand sew all the paw pads in, you will pin a piece of the lining material to the wrong side of paw material (you'll do this for both pieces).

6)  Pin the cuff material to the top of the stocking (right side of cuff to wrong side of paw).  First, make a hem on the bottom of the cuff material.  Then, sew the top of the cuff to the paw.  DO NOT sew the sides of the cuff - only the top.  Do this individually, to both pieces.

7)  Pin both pieces together (right side to right side).  Sew all around the paw:  right edge, bottom, and left edge.  Make sure to turn up the cuff to ensure you DON'T sew it in the incorrect placement and DO NOT sew the tops together.

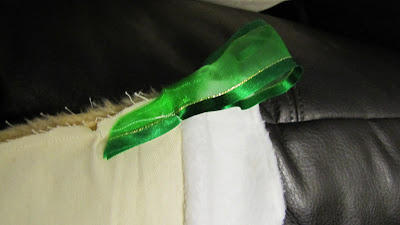
8)  With the cuff still turned up, take a piece of the ribbon and make a loop.  Pin it to the top edge of the paw and sew it to the edge.
Make sure not to sew it to the cuff - sew just to just below the cuff.

9)  Turn the whole piece inside out, so that the right side of the paw is actually showing.  Turn up the cuff again and pin the edges together.
You'll sew the right edge and the left edge closed of the cuff only.  DO NOT sew the top.  After this is done, you just turn the cuff down and make sure the ribbon loop is pulled up.  And you're done!


Linking up to Too Much Time On My Hands get schooled saturday link party.
Also linked up to The 36th Avenue Amazing Christmas Projects  link party.
And linked up to Tater Tots & Jello Favorite Projects of 2011 link party.