Pages

Thursday, May 31, 2012

Interior Doors: Part 1

Hello there!  Lately, I've been working on this time-consuming project.  I originally started it awhile ago, but got stuck.  I'm past that hiccup and I'm rockin' & rollin' now.

All the interior doors in my house were painted an off-white color.  Next to a bright white color (the trim), they look pretty horrible.   The picture below is a good example of the difference in color, but it actually looks worse in person.

On top of that, the previous owners of my house had a kid that liked to draw on the doors with crayon. Thanks, kid.  So, my original plan was to clean the crayon off the doors and then paint them the same color as the trim in the rest of the house:  Behr's Ultra Pure White (satin), which you can buy off-the-shelf.  Simple enough, right?  Somehow, my original two-part plan turned into this:
1)  Take hinges off the doors and door jamb
2)  Strip paint off the hinges
3)  Spray paint the hinges, if they are brass (turns out that they are), in satin nickel to match hardware
4)  Wipe down the doors and clean off the crayon marks
5)  Paint the doors
6)  Paint any trim that still needs it
7)  Put the hinges back on (spray WD-40 on hinge pins)
8)  Hang the doors back up

Yeah, somehow I got it in my head to strip the paint off the hinges - I thought it would make a nice little detail - and that is what turned this into a bigger project.  Here, I'll be explaining my process and tips that you may find helpful. 

So, the hiccup that stalled me on this project was during the hinge removal.  The paint was so thick on some parts of the screw heads and hinges, that I couldn't get the screws off (you can see this in the picture below on the left part of the hinge).  In fact, I stripped 2 of the screws on the first hinge I tried.  Oopsie. 
You can also see here how sloppy painting over the hinges looks

 I had read somewhere that you can get use a screw extractor to get them out.  So, off to Home Depot I went and they recommended this to me.

I followed the instructions (the 3 pictures on the packaging).  First, drill a hole into the screw head.  Hammer the screw extractor into the hole.  Then, using pliers or a wrench, turn the extractor so that it pulls the screw out with it.  Um, yeah, that didn't quite work for me.  The extractor didn't fit tight enough into the hole I drilled in the screw head, so when I tried twisting it out, it didn't get a good grip at all.  This is the sort of thing that happens when you have no arm strength like me.  Note to self:  start lifting my little weights again.  So, my project was on hold for a bit...until Mr. NT was able to help me!   Using the extractor, he was able to get those two stripped screws out with a little bit of muscle.  Sweet!

He also showed me a little trick to get the other painted screws out without stripping them (which my dad tried to tell me about, but for some reason it wasn't translating well enough to me over email).  Using a hammer, I lightly tapped the screwdriver into the screw head to break through the paint and get a good grip.  I then carefully unscrewed it and it just easily came out.  What a concept!  Since the hinges were also stuck on with the paint, I just lightly tapped on it with the hammer and it just popped off.

In the next post, I'll tell you how I stripped the paint from the hinges.   Stay tuned...

Saturday, May 26, 2012

Wildlife

Since I haven't had many projects to show you lately,  I have a back-up post for you.  Hopefully, you won't be bored to death.  zzzzzzzz  :)

The town I live in is not super small, but it's not huge either.  According to Wikipedia, as of 2010 my town's population is 36,877.  I love the small-town feel around here, but knowing that I'm close enough to decent shopping, restaurants, and entertainment is great.  Anyhoo, I wanted to share some of the wildlife I've seen around my house since I've been living here.  It's not like the wildlife that my bff gets at her house, but it's something (actually, some of her wildlife I wouldn't want at my house.  Tarantulas?  Snakes?  No thank you!).  Here are some scenes from around my house...

Have you ever seen a hummingbird sitting still and not constantly fluttering it's wings?  Well, here you go!


I have a pink & white salvia bush that constantly attracts hummingbirds so I see them quite a bit.  I really want to pull it out since it has overtaken the spot that it's in.  It used to be just next to a gate in the backyard, but has now completely grown in front of the gate, so the gate is completely inaccessible.  I have since trimmed it down, but it's got a lot of dead branches on the inside and is kind of stinky.  Anyways, I fear that if I get rid of it, the hummingbirds won't come anymore.  So, maybe if I pull it, I'll get a new & much smaller salvia and plant it in a different spot?  We shall see.

Next up, we have some baby birds.


Mama bird decided to put her nest in a nook & cranny up in my back patio cover.  It was kind of neat to hear them chirping, but it got a bit annoying after awhile.  Just being honest.  ;)  

Another mama bird decided to put her nest in one of the sweet gum trees in my front yard.
I didn't see any of the babies.  In fact, I don't know if any of them made it.  I found a teeny tiny broken egg on my front walkway one day and then my nephew found the nest in my front yard soon after that.  (I think there are some bits of dryer lint in the next. haha)

And because I don't want to end my post with this grossness, I'll put this in the middle of the post. Here's a swarm of bees that decided to try to make my garage their home.  
Disgusting right???   I originally sprayed all these guys as well as the ones that managed to get through the vent and into the garage.  But by the next day, more showed up.  That's when I figured out that their queen managed to make her way into my garage and behind the cabinets to start a nest.  I have more pictures, but I'll spare you.  Ick.

I just saw this guy the other day.  Cute little squirrel.
I see these all the time in the parking lot at my work.  The baby squirrels are actually very cute.  But, when they decide to crawl up into the engines of the cars parked in the lot and cause lots of damage - well, that's when they're not so cute.  Little buggers.

Check out this cool guy!


I'm pretty sure it's a hawk.  If I'm wrong, please let me know.  But, I heard some loud, strange squawking noises I hadn't heard before, coming from the backyard.  And that's when I saw him.  He actually hung out for awhile so I was able to get some good shots of him.

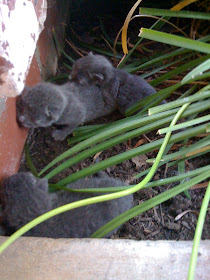
And last, but not least, although they aren't really considered "wild", a stray cat decided to have three kitties on my front porch.


They make the funniest noises when they are that little.  I had never seen kittens that young before.  They were gone by the end of the day, but one of them made an appearance in my backyard a few weeks later.

He got left behind - poor little guy.  :(  I'm not a cat person at all, but how I could I resist this face?  And here he is today.   He may not be wild, but he sure can be a punk sometimes. 

So there you have it.   I hope you weren't too bored, but if you were, I hope you enjoyed your nap.  :) 

Tuesday, May 22, 2012

DIY Bath Mat - Project Fail!


I don't have anything too terribly exciting to post about right now.  This past weekend was a bust - I think I got food poisoning.  I was so sick and spent the entire weekend recovering.  I did attempt another crafty project prior to getting sick, but it was a big fail.  We all have projects like that, right?  Not everything goes according to plan - such is life.  So, I'm sharing it with you today - maybe I'll save you some time or maybe you'll have some suggestions for me.


Here's a little background on it first.  I found my ex-stepsister (I really hate that term, but I'm being technical here) on Facebook earlier this year.  She is 6 months younger than me and at the time we were very, very close.  I think the last time I saw her was in my mid-teens?  It's been soooooo long.  I have so many great memories of the times we spent - crushes on boys, summers at the beach, stopping at little shops on our walks to the beach.  So fun!  So, we have reconnected and discovered that we still have a lot in common including we both love to craft and DIY.  We also discovered that we have pinned a lot of the same stuff on Pinterest.  Now, she lives in Arizona and I'm in California.  We decided that we would start doing some of these pins together - it's a way for us to craft together while being so far away from each other and also a way for us to actually get some of these pins accomplished.  Good idea, right?  :)

The first project we picked was to do a bath mat.
Via Fine Craft Guild
Or a t-shirt rug like this.
Via Rags By Sock Monkey

I decided to use the technique from the t-shirt rug, but use towels instead.  So, I got an old towel that I would use as the base of the rug.  Then, you will cut another towel into little strips and tie the strips into holes in the base of the rug and you will get the cute fluffiness as seen in the two pictures above.  Sounds easy, right?  Heh.

So, I cut the towel to the size I wanted and was going to cut little holes all over so I could tie the towel strips into the holes.


I didn't take a picture of it, but you should have seen all the little fuzzies all over the place after I cut it.  I was expecting a bit of a mess, but wow were their fuzzies everywhere.  Looked like snow (ok, ok, that was an exaggeration, but still!).  So, I decided to hem up the side I cut and that should do the trick, right?  Heh, heh - silly girl.  After hemming it, I shook it many times to get the fuzzies out, but they never really went away.

But then I realized since I would have to cut all the holes into the base of the towel, that there would be no way for me to hem them and there would be fuzzies all the time.  And when I cut the towels into litle strips?  Even more fuzzies!  And I can only imagine how many there would be after washing it all the time too.  So, I decided to save myself some time and I quit right there.  I didn't even get to start snipping little holes in the base - I didn't want to waste my time.

I think my stepsister is going to use t-shirts instead of towels.  She also found one of those grids, in the first picture, at the craft store and she's going to let me know how hers turns out.  Unfortunately, I don't have enough old t-shirts that I can use and I'm trying to be, ahem, thrifty right now.  I'm trying to think of another way to get this done using the resources I have - maybe I should use some of the leftover felt I have, but I'm not sure if I really want to use those colors.  Well, for now, I'm considering this a project fail, but if I figure it out, you'll definitely be seeing it on here.

Friday, May 18, 2012

Introducing...Neutral Territory!

One of my best friends has finally joined the blog world.  I have referred to her in previous posts as Cheesebox - weird nickname, I know - don't ask.  :)   Please pop on over and take a look at her blog, Neutral Territory.  It's pretty fresh - only one post, but she is very talented and will have lots to write about.  She and her hubby bought their house only a month or so after I bought mine and we've had lots of fun talking "house" stuff over the last couple of years.  They did a major transformation on their house and it's awesome with gorgeous lake views.  So, stop on over and say hi and keep on the lookout for some great posts from her.

Thursday, May 17, 2012

Ikea Hat Box Makeover

Hello there!   I don't have much for this week - mostly in-progress projects or project fails (can't win 'em all!), so I have just a quick post for you.  This will show you the wonder of spray paint.

I bought my first set of Ikea hat boxes a few years ago in the color red.  At the time, my decor involved red, but then I started going lighter in color, so bought the off-white set last year.  (This was before I discovered the wonder of spray paint).  So, these red boxes were banished put in the guest bedroom, which has a red accent wall (which will hopefully get painted over sometime this year) and they just got lost against the wall.   I previously posted about my TV & entertainment center cord organization which briefly showed how I transformed a red Ikea box into an almost-perfectly-matched box with the other Ikea hat boxes on the same Expedit shelf unit.  So, I decided to paint the red hat boxes while I was at it.

I did a couple of coats of primer and then sprayed the smallest & biggest box in Rustoleum's Heirloom White with a couple of coats.

I actually ran out of Heirloom white, so I sprayed the middle box with Krylon's Glossy White since that's what I had.  I was thiiiiiiiiis close to spraying it with Rustoleum's Aqua, but changed my mind.  Hmmm...I can always do it later if I change my mind again.  :)

So, if you have something you're considering getting rid of because you don't like the color, I would suggest that you try spray painting it first.  It really can have amazing results.   

Linked up to:

Thanks for stopping by! 

Monday, May 14, 2012

Chalkboard Tags

Wow!  Another weekend has gone in a flash.  This past weekend involved a super quick trip to Las Vegas because one of my closest and oldest friends got married.  We've known each other since we met in kindgergarten - that's a 32 year friendship, people!  I'm so, so happy for her - congratulations, Heather!  Love ya!
Now that this weekend is over, I will finally have some time to relax and get some other things done.  I'm looking forward to more projects, but, I'll just have to get myself back into the swing of things around here.

Now, on to the post for the day...chalkboard tags!

I've seen different versions for awhile on different blogs and Pinterest.  Many of them were made of vinyl that you could adhere to a plastic/glass container or a wall/door surface.  I needed mine to be as cheap as possible (yet, still lookin' like a million bucks) and also something that I would be able to make at anytime when I needed more.  So, here's a quick tutorial.

Supplies needed:
*  Cardboard
*  Scissors
*  Chalk paint
*  Jute
*  Chalk
*  Hot glue/glue gun

1)  Remember this picture from awhile ago?  As soon as I saw the spray chalk paint, I knew I could use it to make these tags.  So, get out your can of spray or regular 'ole chalk paint.

2)  Cut your cardboard to whatever size you'd like.  I didn't do any measuring - I just cut them free-hand.

3)  Spray the chalk paint onto the cardboard.  I didn't read the directions on the can until I was already in the midst of painting, but I did two quick coats.  It seemed as the though the paint dried pretty quickly - maybe because the cardboard soaks it up a bit? 

4)  And then test it out...
It was the first time I used chalk paint so I had to make sure.  :)

5)  Once dried, use your hot glue & glue gun and glue the jute around the edges of your pieces.  This will cover any raggedy and uneven edges.   Like I mentioned, I didn't do any measuring when I cut them, so my pieces weren't always straight and even.  I wasn't striving for perfection here.


6)  Then punch a hole where you would like so you can tie your tag to your item.  I used my Crop-a-dile to punch the hole.

7)  Take a thinner piece of jute (or whatever you'd like) and string it through the hole and tie it around something.  This is what I did to hang my tag from.

Ta da!  Super easy, super cute, and best of all super organized!  I made a total of 8 tags and plan on making more if I need them.  I'm using them in my linen closet & pantry so far and am loving them.

Linking up to:
The NY Melrose Family's Whimsy Wednesdays link party

The DIY Dreamer's From Dream to Reality link party

Creatively Living's Tell It To Me Tuesday link party

Homework's Inspiration Board link party

A Bowlfull of Lemon's One Project at a Time link party

How to Nest for Less' Just a Party With My Peeps link party

Home Stories A to Z's Tutorials & Tips link party

House of Hepworths' Hookin Up WIth HOH link paty

Live Laugh Rowe's Live Laugh Linky link party

Delightful Order's Delightfully Inspiring Thursday link party

One Artsy Mama's Shine on Fridays link party

Too Much Time's Get Schooled Saturday link party

Tatertots & Jello's Weekend Wrap Up Party link party

Ask Anna's Weekend Warrior link party


Thanks for stopping by!
Posted by http://adventuresindiy1759.blogspot.com/