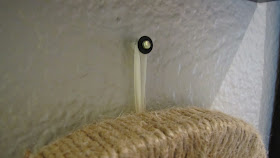
Right before I left on my trip, I finished sewing the cover for my bench cushion, but I didn't quite like how it turned out. So, after I got home, I took some of it apart, made some quick adjustments, and all is right in bench-cushion-world again. I know I already posted about the window seat cushion I made, but that was a learning process, so now that I knew what to do this time, I can include a tutorial.
Supplies Needed:
*Sewing machine
*Foam
*Fabric
*Thread
*Measuring tape
*Scissors (or rotary cutting blade & cutting mat)
I decided that I wanted to keep one of the sides open, so in case I needed to wash the cover, I could just slip it on and off. I thought about various ways to do this and decided to sew one of the short sides like a sham pillow cover. This way, the two pieces stay closed on it's own when the foam is inside, but it can still be opened easily to remove it. (I also considered using velcro or buttons, but I bought the wrong velcro and was too lazy to learn how to sew button holes).
1) I started out by cutting a piece of foam to fit the bench. It ended up measuring to be 62" long, 16" wide, and 2" thick. Cutting foam is a pain in the booty - consider yourself forwarned.
2) Now that I knew what the foam measurements were, I could figure out how to cut the pieces of fabric (I added an inch to the measurements since I needed 1/2" of a hem on each side of the fabric). I needed 2 pieces 17" x 63" (top & bottom of the cushion), 3 pieces 3" x 17" (the two short sides of the cushion), and 2 pieces 3" x 63" (the two long sides of the cushion). With the extra fabric I had left over, I cut some strips (not measured) to make straps to tie it to the bench. I used my rotary cutter to cut these pieces out (I washed the fabric first).
3) After cutting all my pieces, I pinned the appropriate pieces together (with the wrong side out) to form the cover: top piece to #1 long side piece, that #1 long side piece to the bottom piece, then both top & bottom piece to #2 long side piece. Then, attach #1 short side piece to the ends of all those pieces).
4) Then, I just started sewing away. The picture below shows how I sewed the extra strips of fabric between the bottom piece and one of the long sides to make the ties so I could secure the cushion to the bench.
 |
| Here is what it looked like when I sewed the strap on. |
 |
| Here is what the strap looks like after it's finished. |
6) I turned the whole thing inside out and stuffed the foam into the open "sham" side of the cover. And that was all there was too it!
 | |
| The "sham" side of the cover. It's not very noticeable. |
 |
| Here is the "sham" side again with the tie. |
 |
| And here it is again in case you missed the first time. :) |
**Update: I finally found my receipts so I can tell you how much money I saved by doing this myself. I bought both the fabric and foam on sale for 50% off. The fabric was $39 and the foam was $27. I even have some foam leftover. Total cost was $66. If I had ordered a custom cushion it would have been $120-$135! That's a savings of $54 - $69!


