Hey, hey there! First of all, I just wanted to say that I was very excited for today to come because the new No Doubt album "Push and Shove" came out. They are one of my favorite bands and the album is excellent! It has an 80s vibe to it and I just love it! You should check it out if you haven't already!
Ok, onto the post...as part of my garage organization project (which seems to be never-ending), I have re-organized all of my paint. Ideally, I would rather store the paint in a room that has more temperature control (our summers get pretty hot). But for now, the garage is where my paint has to be stored. So, this is what I was dealing with before (for the record, it wasn't me that stored the cans in this way. Ahem).
These cabinets in the garage have removable shelves. The
shelf was taken out and the cans were stacked on top of each other.
They were an accident just waiting to happen. I could just picture
them toppling onto me & splattering all over the floor whenever I
needed to get in there. And you can see that some trays and
dropcloths were just stacked on top sloppily.
Here's what I did..
1) Take all of the paint out of the cabinet & check if
they are still good:
This step was easy. I just opened each can and stirred the
paint really, really well. Some of the colors had separated
from the paint, but once I stirred it, they were back to
normal. I only came across one can of paint that was bad.
You can see in the picture below, the paint was very gloppy.
It reminded me of when you melt marshmallows and there are still some
blobs that aren't completely melted. Marshmallowy paint is no bueno.
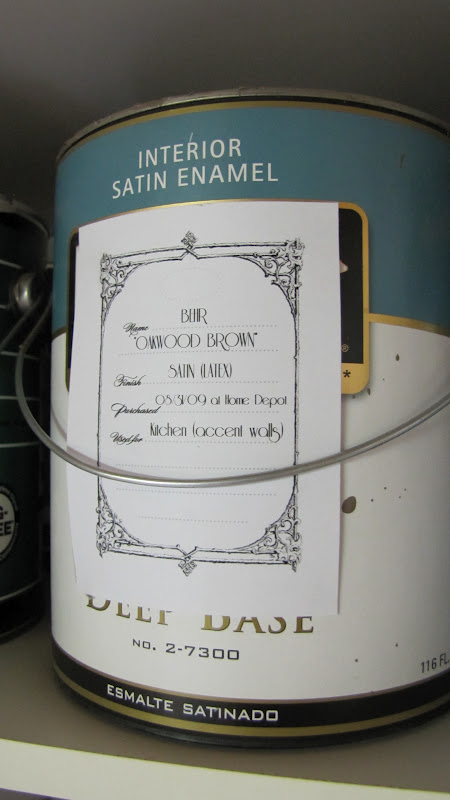
2) Make a label for each paint can:
All the paint labels/color information is stuck onto the top of
the can, so I would have to pull out each can to search for a
particular color. With the labels attached to the front, I don't
have to do that. Even though I planned on using the original paint
cans as opposed to the pretty silver cans in the link below, these
labels made them look a tad bit more uniform. I just downloaded the
printable from
Brooklyn Limestone's post and was able to customize my labels with
the following information: Brand, Paint name, finish, date
purchased, store purchased, and rooms used in. Using dabs of hot glue in each corner, I attached the label to the front of the paint can. Easy!
3) Transfer paint into new containers:
I decided to skip this step. I had enough room in the cabinet.
4) Re-do the shelves and clean them:
One of the shelves had been taken out of the cabinet so the cans
could be stacked. Before putting it back in, I cleaned that cabinet
really well and put the shelf back in it.
Once I did these steps, I was ready to put everything back and
this is how it came out.
The teal colored box with the handle (on the bottom shelf) holds all of my spray paint and
small pots of paint samples. I made this out of an old cardboard box
and covered it with the teal wrapping paper. I punched two holes in
the front and threaded the jute rope through for a handle. It makes
it easy for me to pull out all the spray paint and paint samples all
at once. It all looks much more organized and not like a big mess.
Again, here was my plan of attack:
1) Take all of the paint out of the cabinet & check if they are still good
2) Make a label for each paint can
3) Transfer paint into new containers??
4) Re-do the shelves and clean them (one of the shelves was taken out and put into another cabinet)
5) Organize paint supplies (brushes, rollers, trays, dropcloths, painter's tape, etc)
6) Find a disposal center for any paint I know I won't use again
My
main focus the other day was 1-4. #5 will be done later since the
supplies are stored in the other cabinet below the paint and #6 - well that's
just going to take me awhile to figure out where to dispose of the paint
and actually get myself to do it. It will get done, though. Promise.
I'mjustnotgoingtosaywhen. :)
Here's a quick before-and-after since we all love those.
BEFORE
AFTER
I feel much better now that it's all organized. I've been doing
more painting projects lately, so this makes life easier. And it's
another step closer to getting the garage organized. Baby steps,
people...baby steps.
Posted by:
http://adventuresindiy1759.blogspot.com/